

JavaScript gives developers the ability to write back end and front end code with one language. Node.js on the server-side, JavaScript and it's front end frameworks on the client-side. This article shows how to connect these parts in development.
In this article, you will learn to set up a React and Node app with the steps:
- Install dependencies
- Add proxy to client package.json
- Add start scripts
Prerequisites
To follow through this article, the reader should have basic knowledge of React and Node/Express servers.
Getting started
We need a front end and back end before we discuss connecting them 😅. We will start by creating a React client and a simple Node backend.
create a folder and change directory into it:
$ mkdir react-node && cd react-node
Creating a Node backend
Create a Node app
$ npm init -y
The -y flag tells npm to respond with yes to all prompts.
Open your editor of choice and create a file, app.js; we would create a server here using the express package. Install express:
$ npm install express@latest
Create the express server in app.js:
const express = require('express');

const app = express();
const PORT = process.env.PORT || 5000;
app.listen(PORT,() => {
    console.log('Server is listening at port:', PORT)
});
The server listens at a port predefined as an environment variable, PORT. Port 5000 is used if none is defined.
We should create a endpoint to test with. Create a express route that returns the current date:
const express = require('express');
const app = express();

const PORT = process.env.PORT || 5000;
app.get('/api/hello', (req, res) => {
    res.send({
        date: new Date()
    })
})

app.listen(PORT,() => {
    console.log('Server is listening at port:', PORT)
})
I advise that all API routes are named as api/*, this would help filter api routes from client routes.
Now, run the server:
$ node app.js
You should see the app running:
$ Server is listening at port: 5000
Creating a React client
Create a React app with the
create-react-app package:
$ npx create-react-app client
This bootstraps a React app for you in a new client folder.
Connecting
During development, both the Node back end and the React app will have to be running. This could easily be done by opening two different command prompt tabs but that will mean having to keep track of those tabs. Instead, we will run both processes simultaneously in a single tab using a Node package, concurrently.
Installing dependencies
Install concurrently and nodemon —to keep the Node server running and updating after changes—in the base directory:
$ npm install nodemon concurrently
Add proxy to client package.json
Add the proxy field and the value to the package.json in the client folder:
"proxy": "http://localhost:5000",
"scripts" : {
 [...]
}
The proxy field tells the development server to direct all unknown requests to the value of the field, http://localhost:5000 so Ajax requests such as fetch('/api/hello') will be directed to the backend server.
Add start scripts
Add the start-watch script to the package.json in the react-node folder, not the client folder:
{
"scripts":{
"start-watch": "nodemon app.js",
[...]
}
}
This script starts the back end server with nodemon.
Now, add the dev script:
{
"scripts":{
"dev": "concurrently \"yarn run start-watch\" \"cd client && yarn start\"",
[...]
}
}
This script uses concurrently to run two processes; the backend server and the React app.
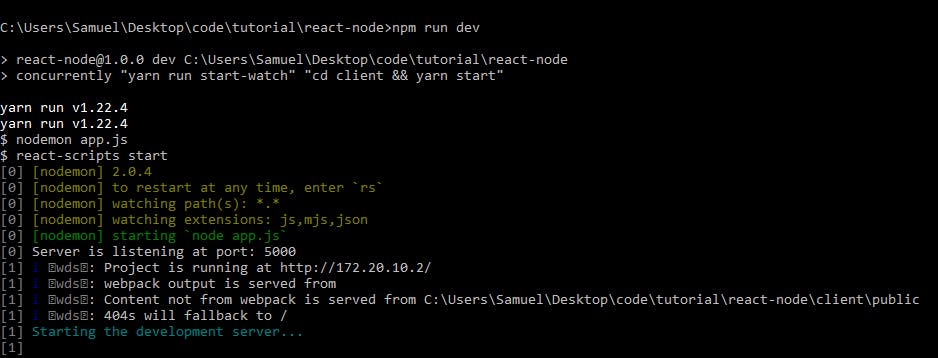
Run the dev script:
$ npm run dev
You should see both processes starting up:
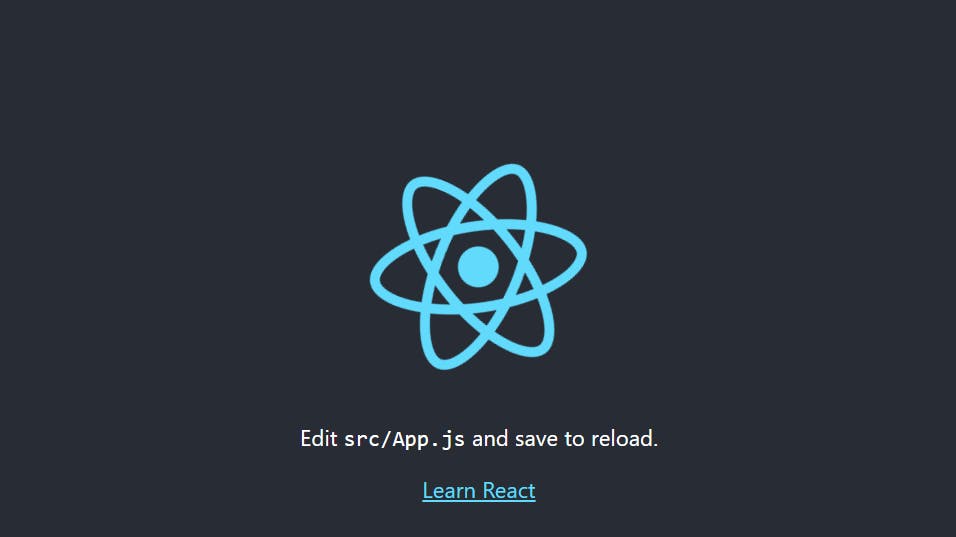
The app should be up at 'localhost:3000':
Yay! that is it for connecting. Let's add some logic to test things.
Open the client/App.js file and add this code:
import React, { useState,useEffect } from 'react';
import logo from './logo.svg';
import './App.css';

function App() {

  const [date, setDate] = useState(null);

  useEffect(() => {
    fetch('/api/hello')
    .then((response) => response.json())
    .then((json) => {
      setDate(json.date)
    })
    .catch(() => {

    })
  })

  return (
    <div className="App">
      <header className="App-header">
        <img src={logo} className="App-logo" alt="logo" />
        <p>
          Edit <code>src/App.js</code> and save to reload.
        </p>
        <h2>The date from backend is {date}</h2>
        <a
          className="App-link"
          href="https://reactjs.org"
          target="_blank"
          rel="noopener noreferrer"
        >
          Learn React
        </a>
      </header>
    </div>
  );
}

export default App;
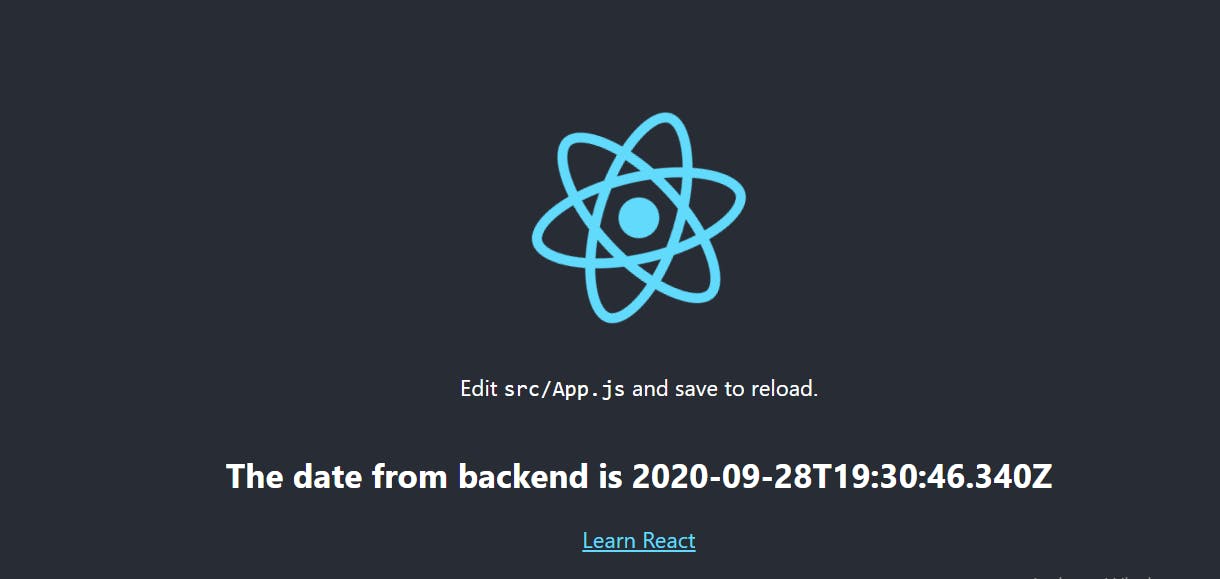
Check the app, you should see the app displaying the date from the backend:
Conclusion
We have discussed how to connect a React App with a Node back end in development. I would be publishing another blog post on setting up for production; follow this blog or follow me on twitter to get notified.
Other blog posts you should check out:
Make sure to like, share and drop your reactions. Thanks for reading.